Our Signature
Correspondence is the curb appeal of professional relationships. Use the below form to create your very own email signature.
Customize your email signature!
Step 1 of 3
Enter Contact Info
Your New Signature
Use the HTML option if your email provider supports code editing. Otherwise, copy and paste the signature through your email settings. For additional questions and support, please see the below step-by-step instructions or reach out to servicedesk@longandfoster.com.
Add to Gmail 
Instructions
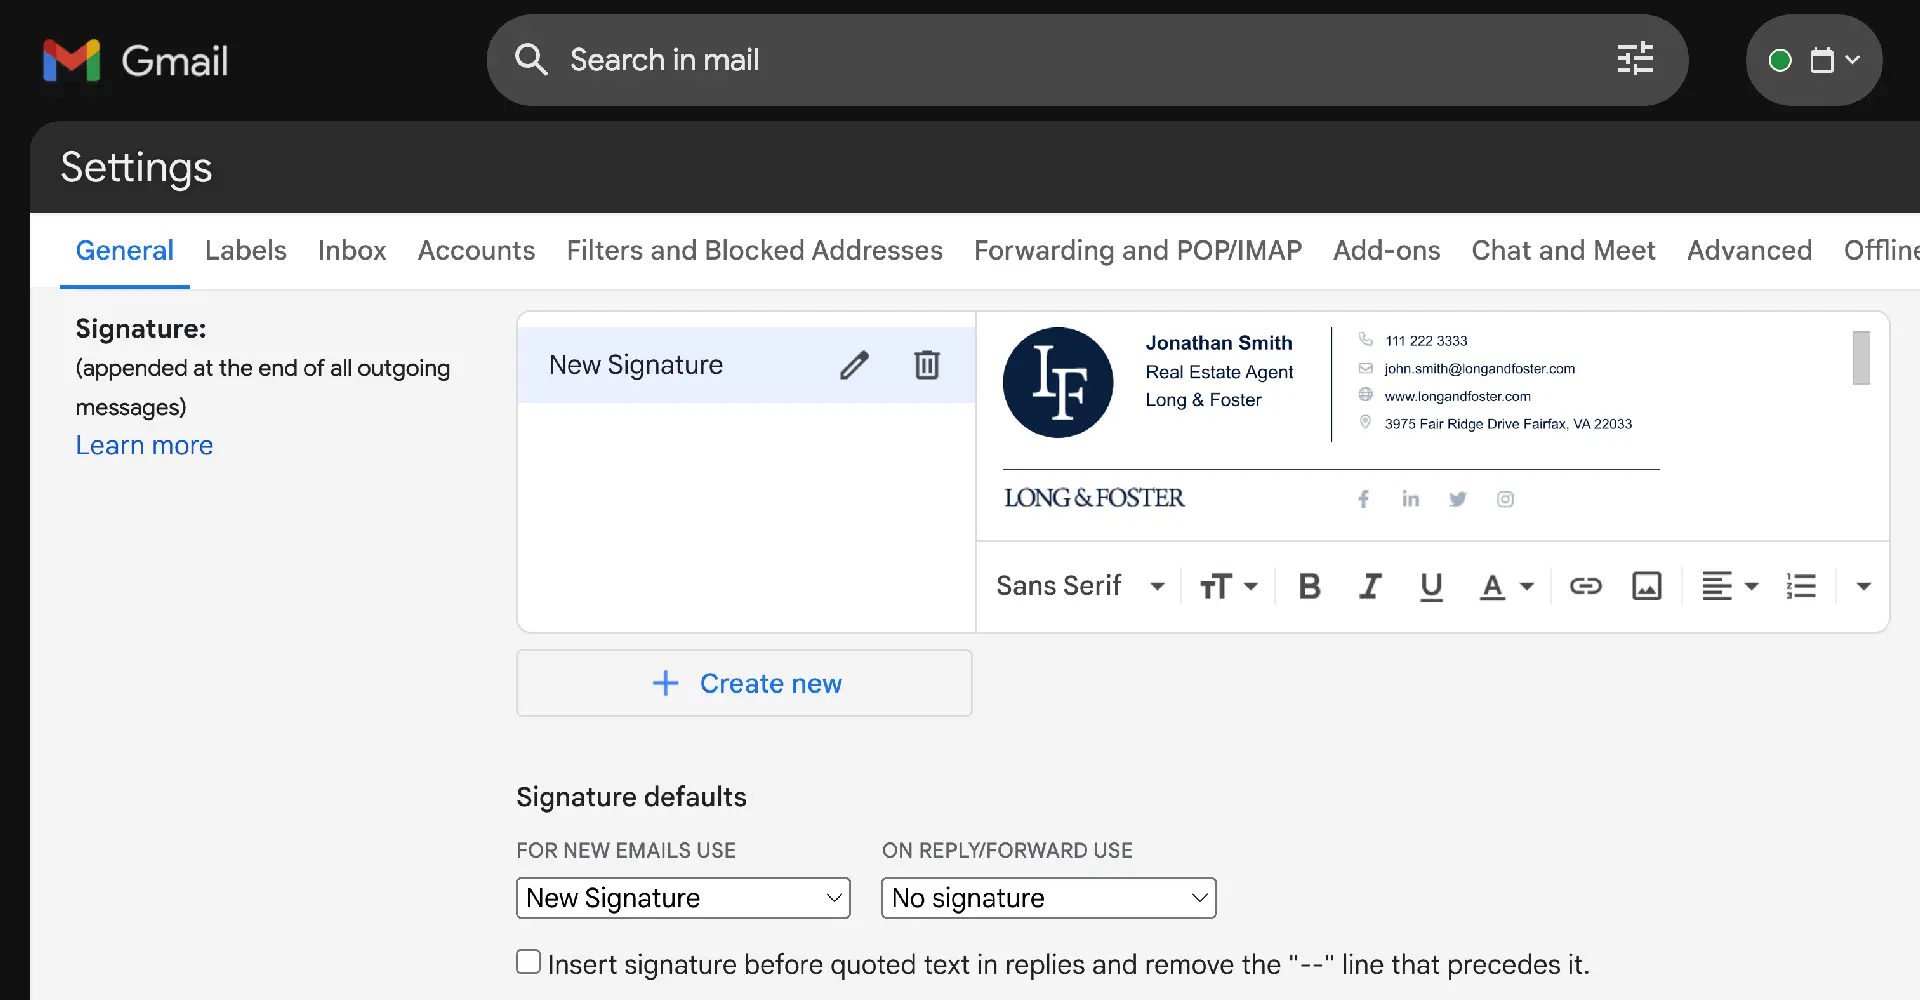
- Log in to your Gmail account, then click the cog icon in the top right corner.
- Select "See all settings" from the menu.
- Scroll down to reach the email signature editor. Create and paste your new signature there.
- Scroll to the bottom of the page and click 'save changes'.
Add to Outlook 
Instructions for Desktop
To create a signature in Outlook for Windows and Mac
- Log in to your Outlook account and select the Home Tab > New Email.
- Click the Message tab.
- In the Include group section, select Signature > Signatures.
- In the Choose Default Signature section, select the account you would like to associate with the signature from the email account dropdown.
- In the Select Signature to Edit section, click the New button and name your signature.
- In the Edit Signature section, paste in your generated signature and select OK.
Instructions for the Web
To create a signature for Outlook on the web and Outlook.com
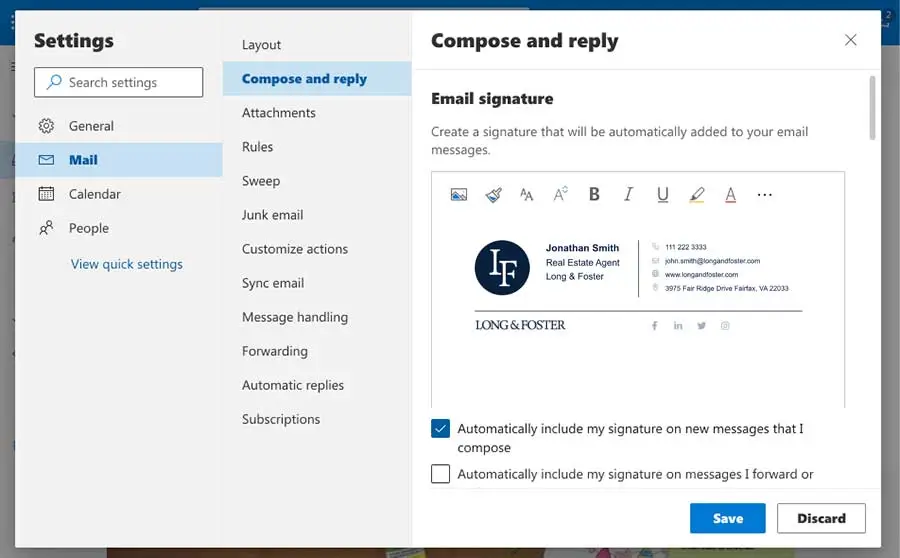
- Log in and click on the cog in the top-right corner.
- Select View all Outlook settings at the bottom of the column.
- Navigate to Email > Compose and Reply.
- Name your signature in the Edit Signature name field.
- Paste your signature for Outlook in the Edit Signature section.
- Select Save.
Add to Yahoo! 
Instructions
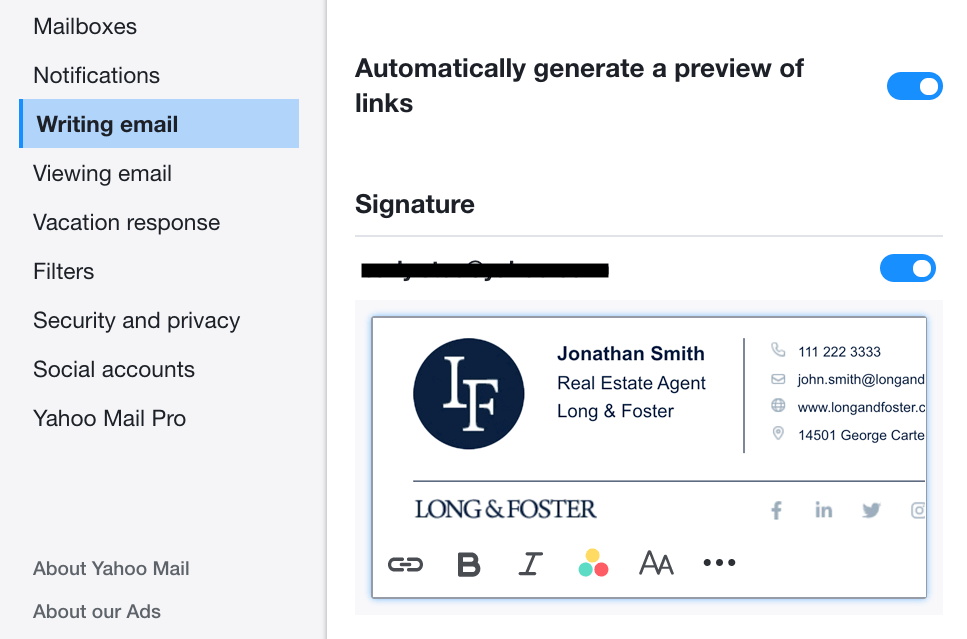
- Log in to your Yahoo Mail account and select Settings > More Settings.
- On the left side of the screen, select Writing email and then locate the Signature header.
- If you have multiple Yahoo Mail accounts, use the toggle to toggle on the account you want to customize your email signature for.
- Paste your new email signature into the text box to save it.
Add to Apple Mail 
Instructions for Apple Mail 2023
- First copy the signature HTML to your clipboard by pressing the button Copy Source Code . We'll need this later.
- Then open Apple Mail on your Mac and click on the Mail menu. From the dropdown, select Settings.
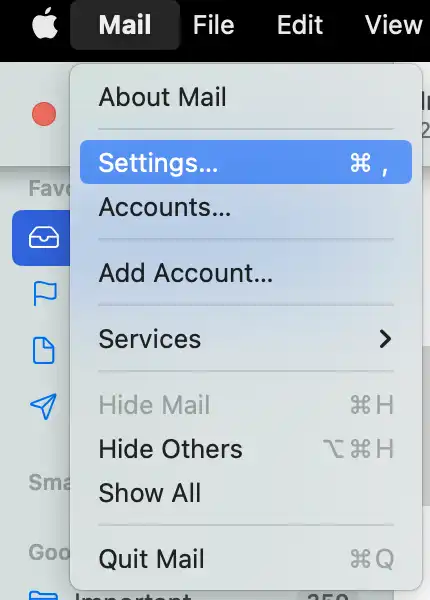
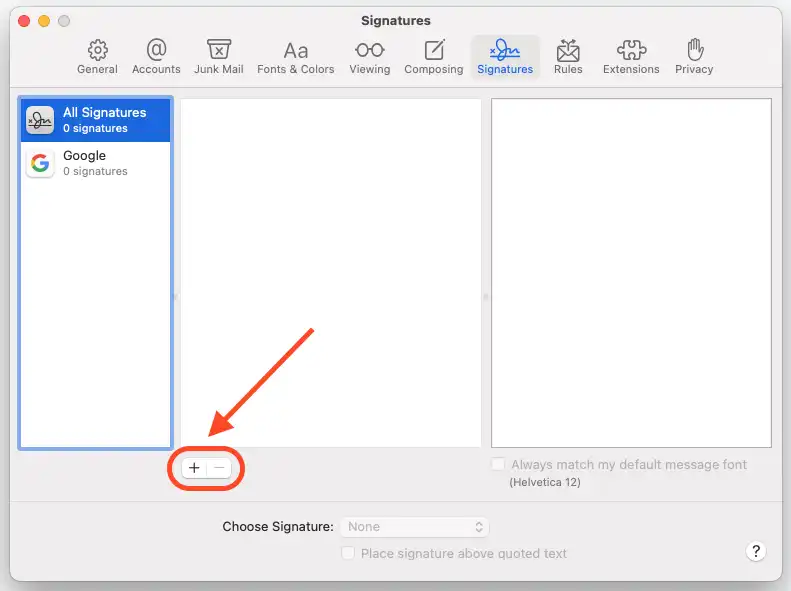
- Within Settings click on the Signatures tab to see a list of all your signatures. To add a new signature, click the button.
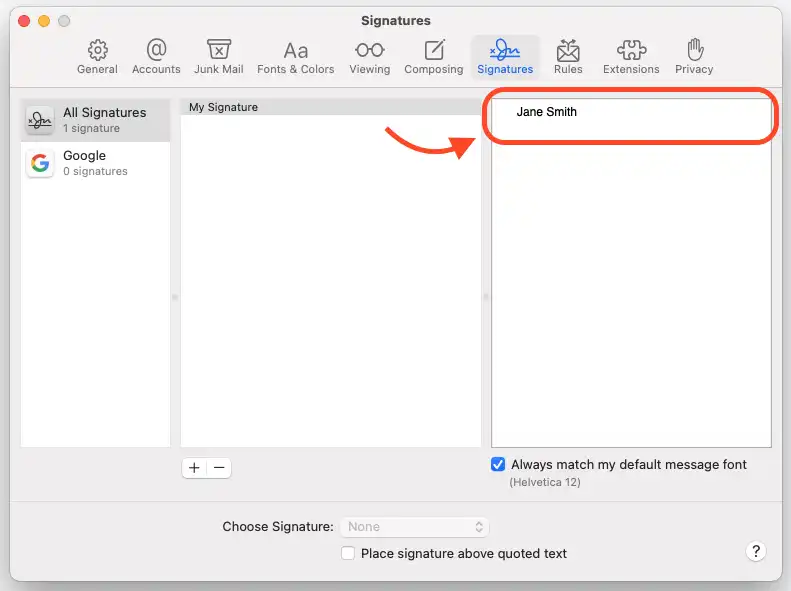
- Add placeholder text to your signature. This text will be replaced by your HTML signature, so don’t worry about the content.
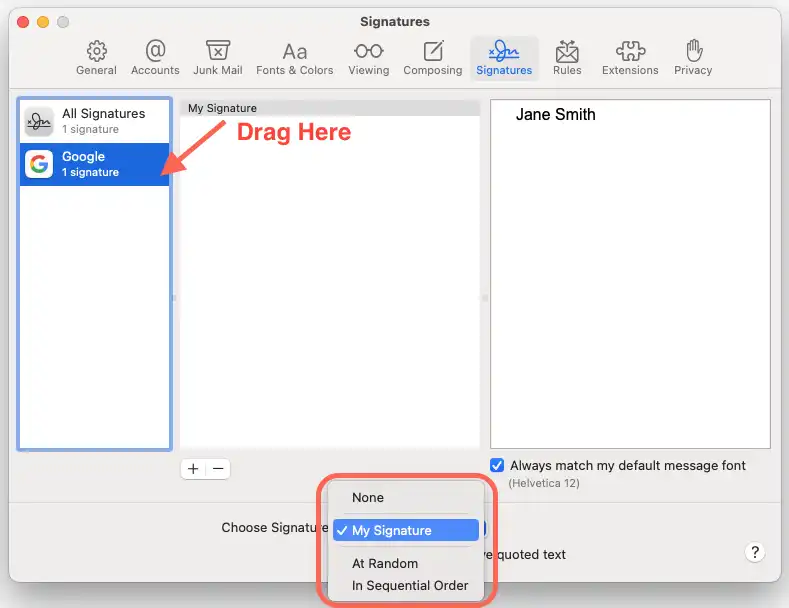
- Drag the signature to your email account in the left column, and select your signature under Choose Signature.
- Next, close the Settings window, and quit Apple Mail. It's important to completely close Apple Mail. When you quit, your signature will be saved in your system. This is a placeholder until you implement the HTML signature by following the steps below.
- To install your HTML email signature, select Go > Go to Folder in the Finder menu bar.
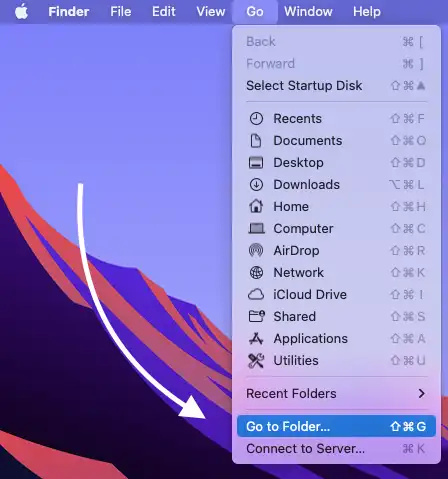
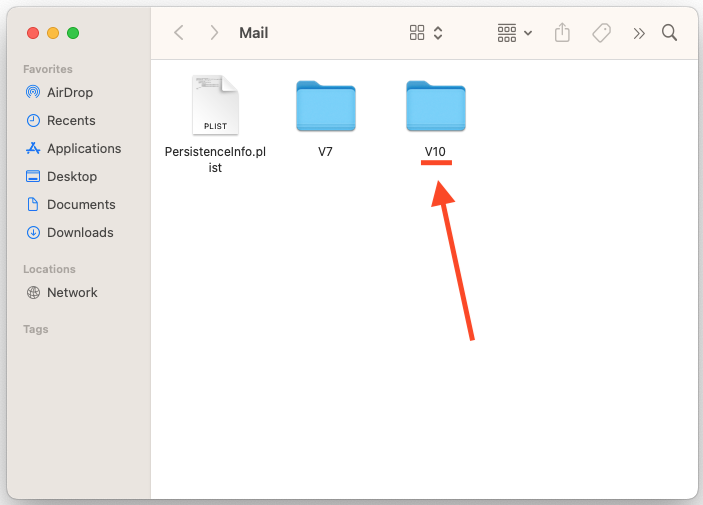
- In the window, type ~/Library/Mail and click the Go button.

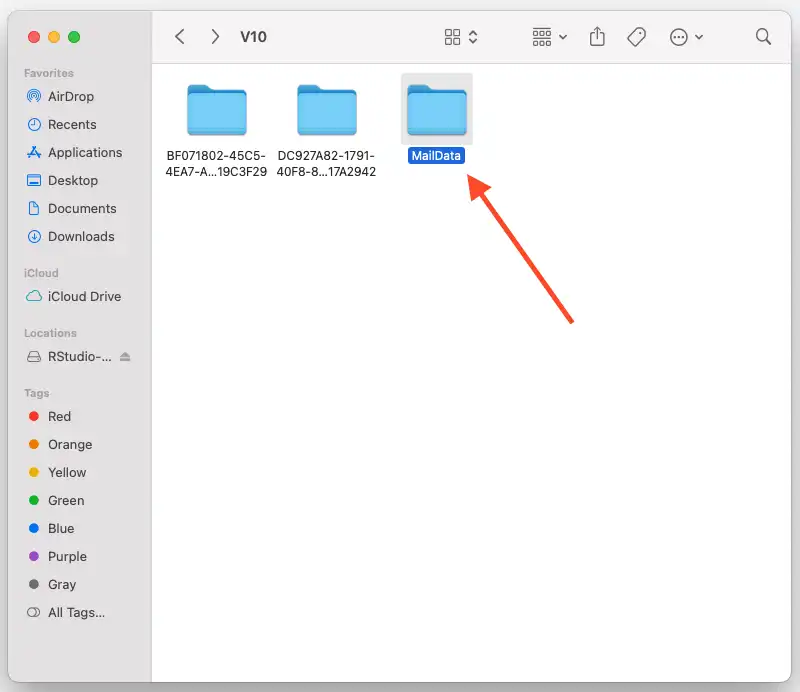
- In the new window that appears, click on the folder with the highest number following the letter “V.” This folder holds the latest version.
- Choose MailData.
- Choose Signatures.
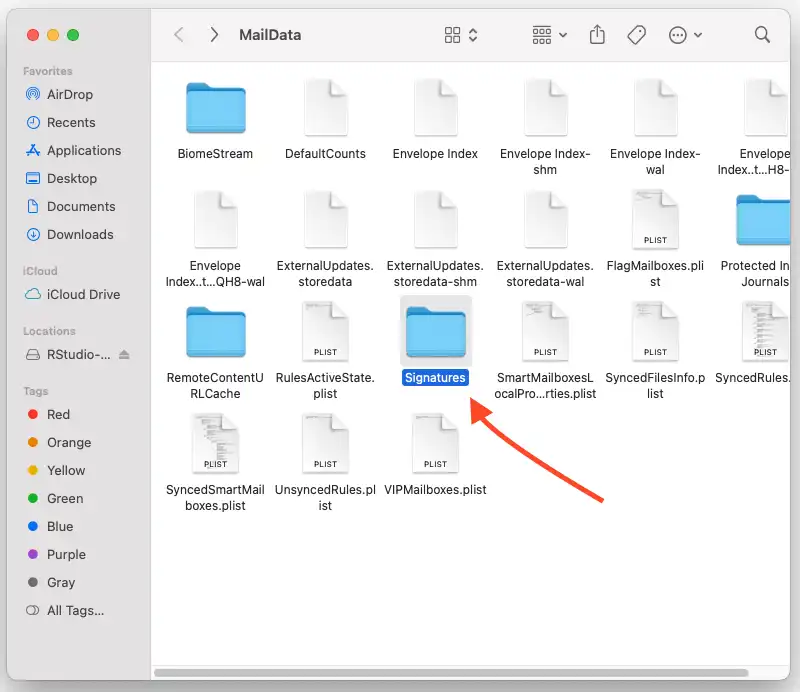
- In the Signatures folder, you’ll see a list of signature files. Look for the file you just edited by examining the Modified date and open the newest file that ends with .mailsignature.
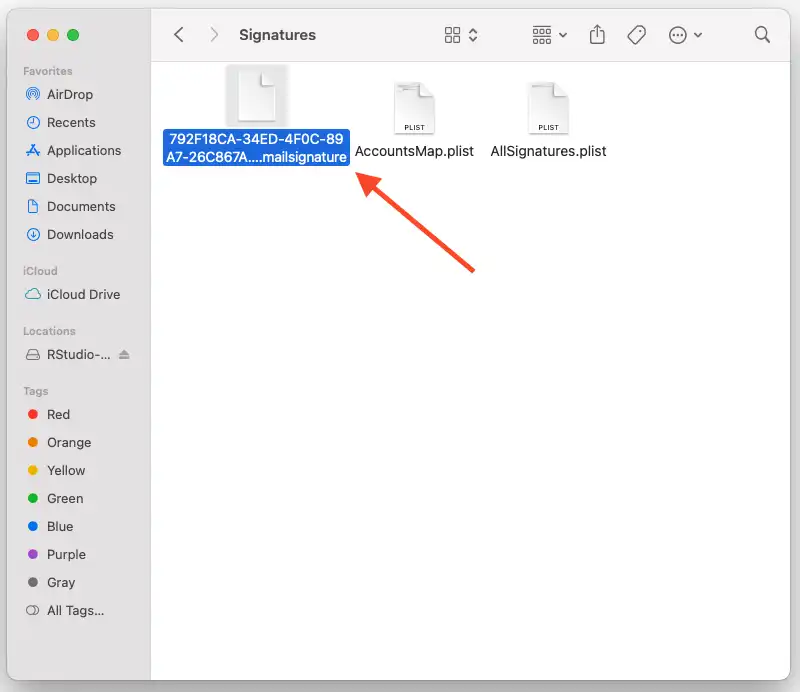
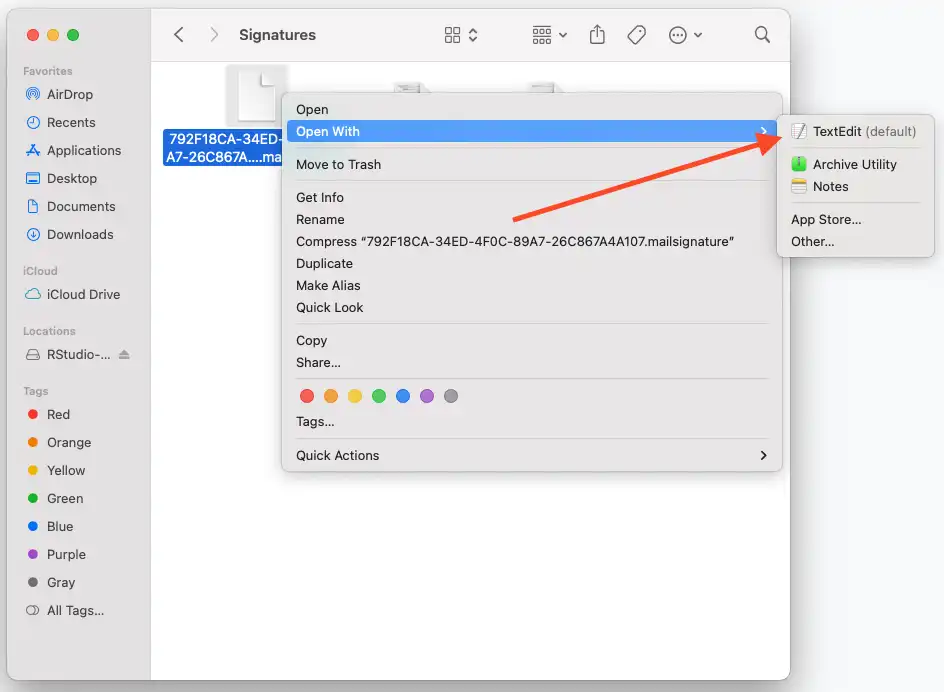
- Right-click on the signature file and choose Open With > TextEdit.
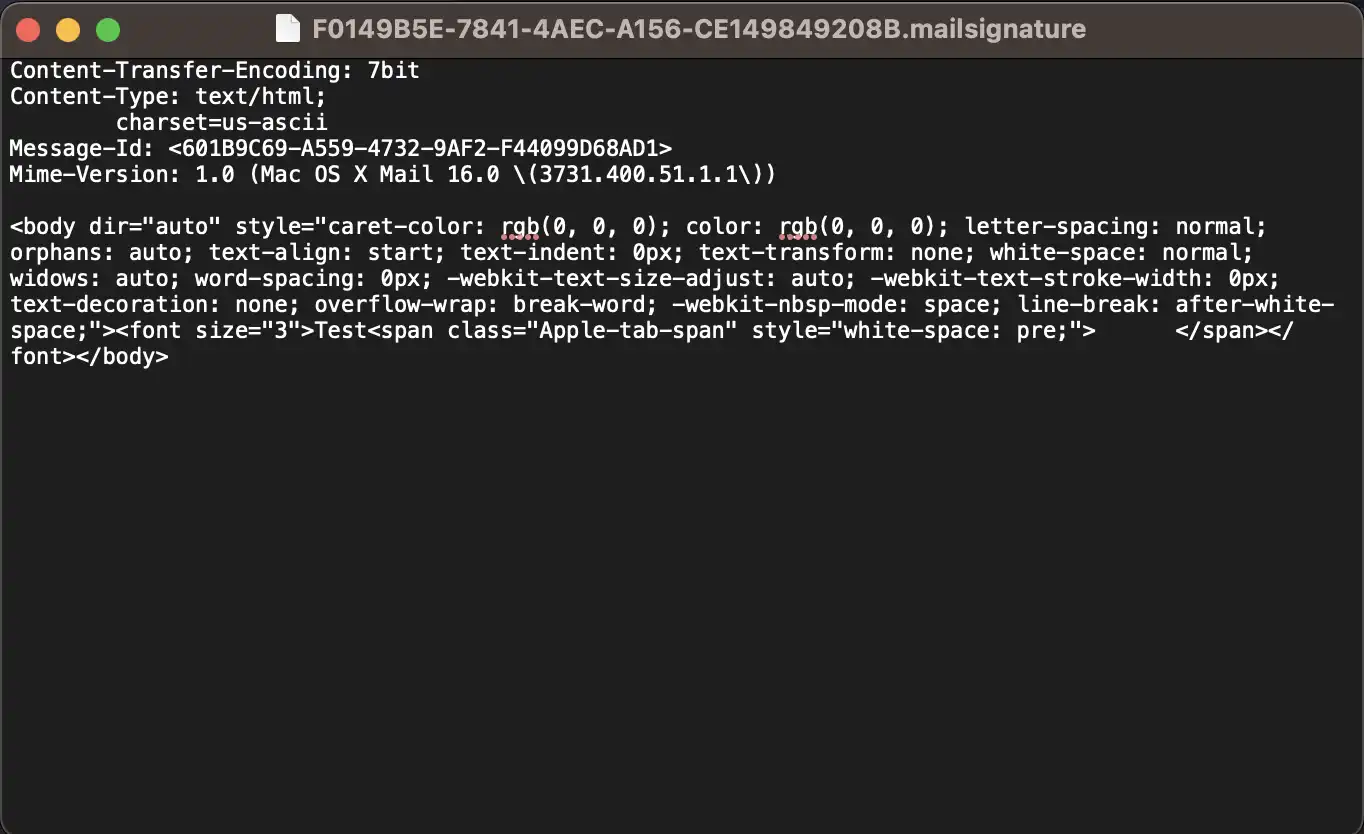
- While the TextEdit window is open with the .mailsignature file, select the content starting with "<body …" and replace it by pasting the pre-made HTML data (CMD+V). Do not delete the data above "<body …"
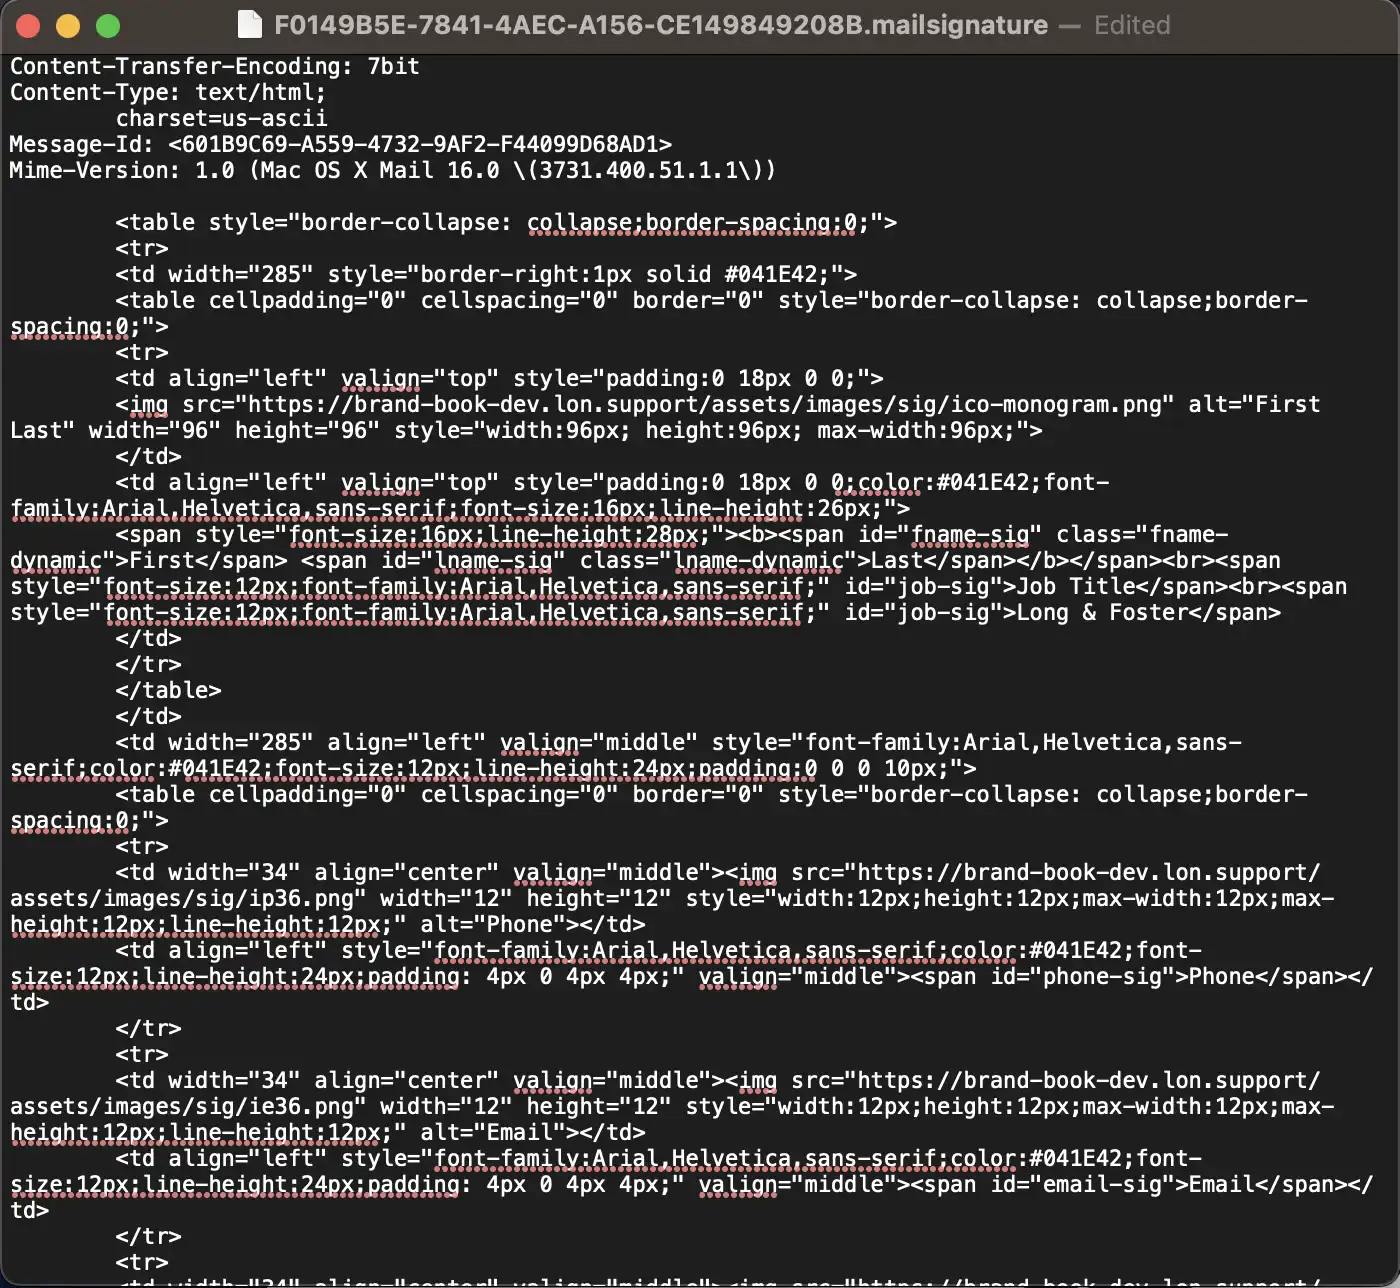
- Your .mailsignature file should look something like this after you’ve replaced the text:
- Save the file and Close TextEdit.
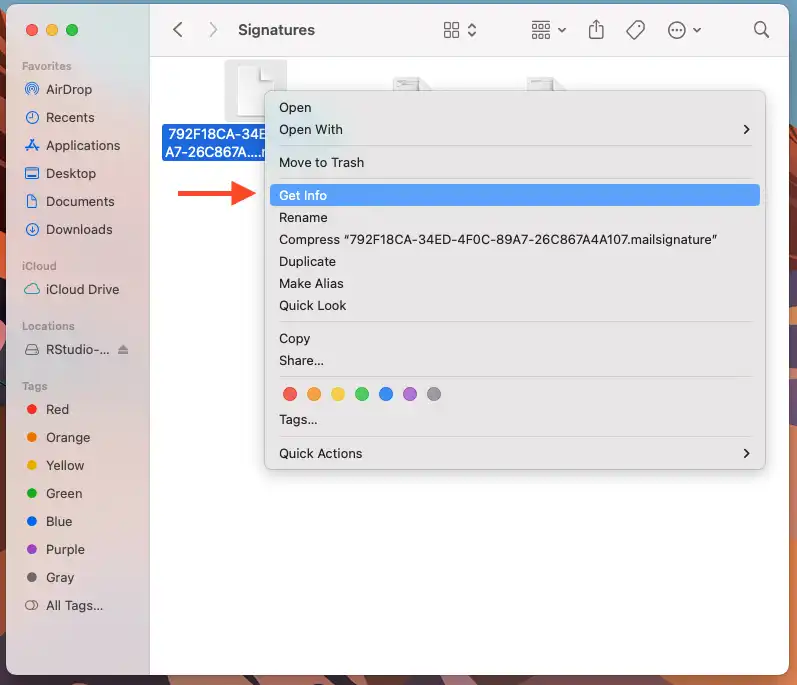
- Right-click on the mail signature you just edited and choose Get Info.
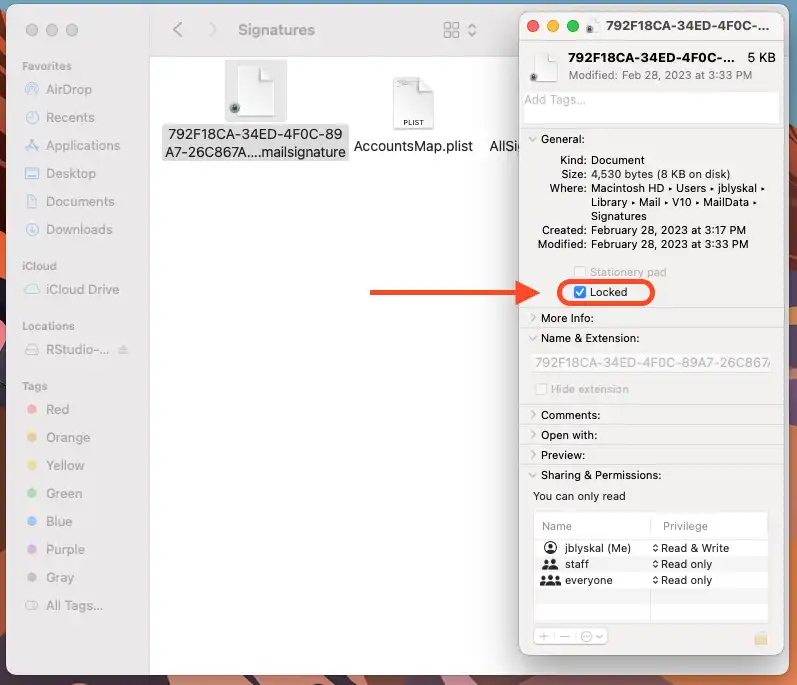
- Check the checkbox labeled Locked to prevent Apple Mail from overriding your new HTML signature. Do not omit this step, otherwise Apple Mail will override your signature.
- Open Apple Mail again and compose a new message to preview your new signature.
NOTE: If images appear broken, you may need to allow remote content. This does not mean images are broken to recipients, but for you to preview the images you need to go into Settings > Privacy and uncheck the box Block Remote Content

